
A bit of a departure from education posts… over the summer here in Beijing, I got back into mixing and relearned some old skills. I also picked up some new technical skills, including the complexity of recording sets on a laptop without extra hardware. After getting it to work, I upgraded my laptop, lost access to some key software and had to find an alternative and start again. So here goes with a little evening project turning the screenshots into an infographic in Canva.
My Setup

- MacBook Pro M2 with OS Monterey, headphones and speakers
- Hercules Inpulse 200 (basic DJ controller) with DJUCED Software
- BeatPort subscription for music (synced with DJUCED)
- Audacity for recording
- BlackHole Virtual Cable*
*On OS Big Sur, I was using SoundFlower, but this is not compatible with Monterey.
When you are mixing, you need to be able to hear the music from the speakers and record at the same time. To improve, you need to be able to record and listen to your mixes… but if you use a subscription music service (like BeatPort), your controller software might block recording directly.
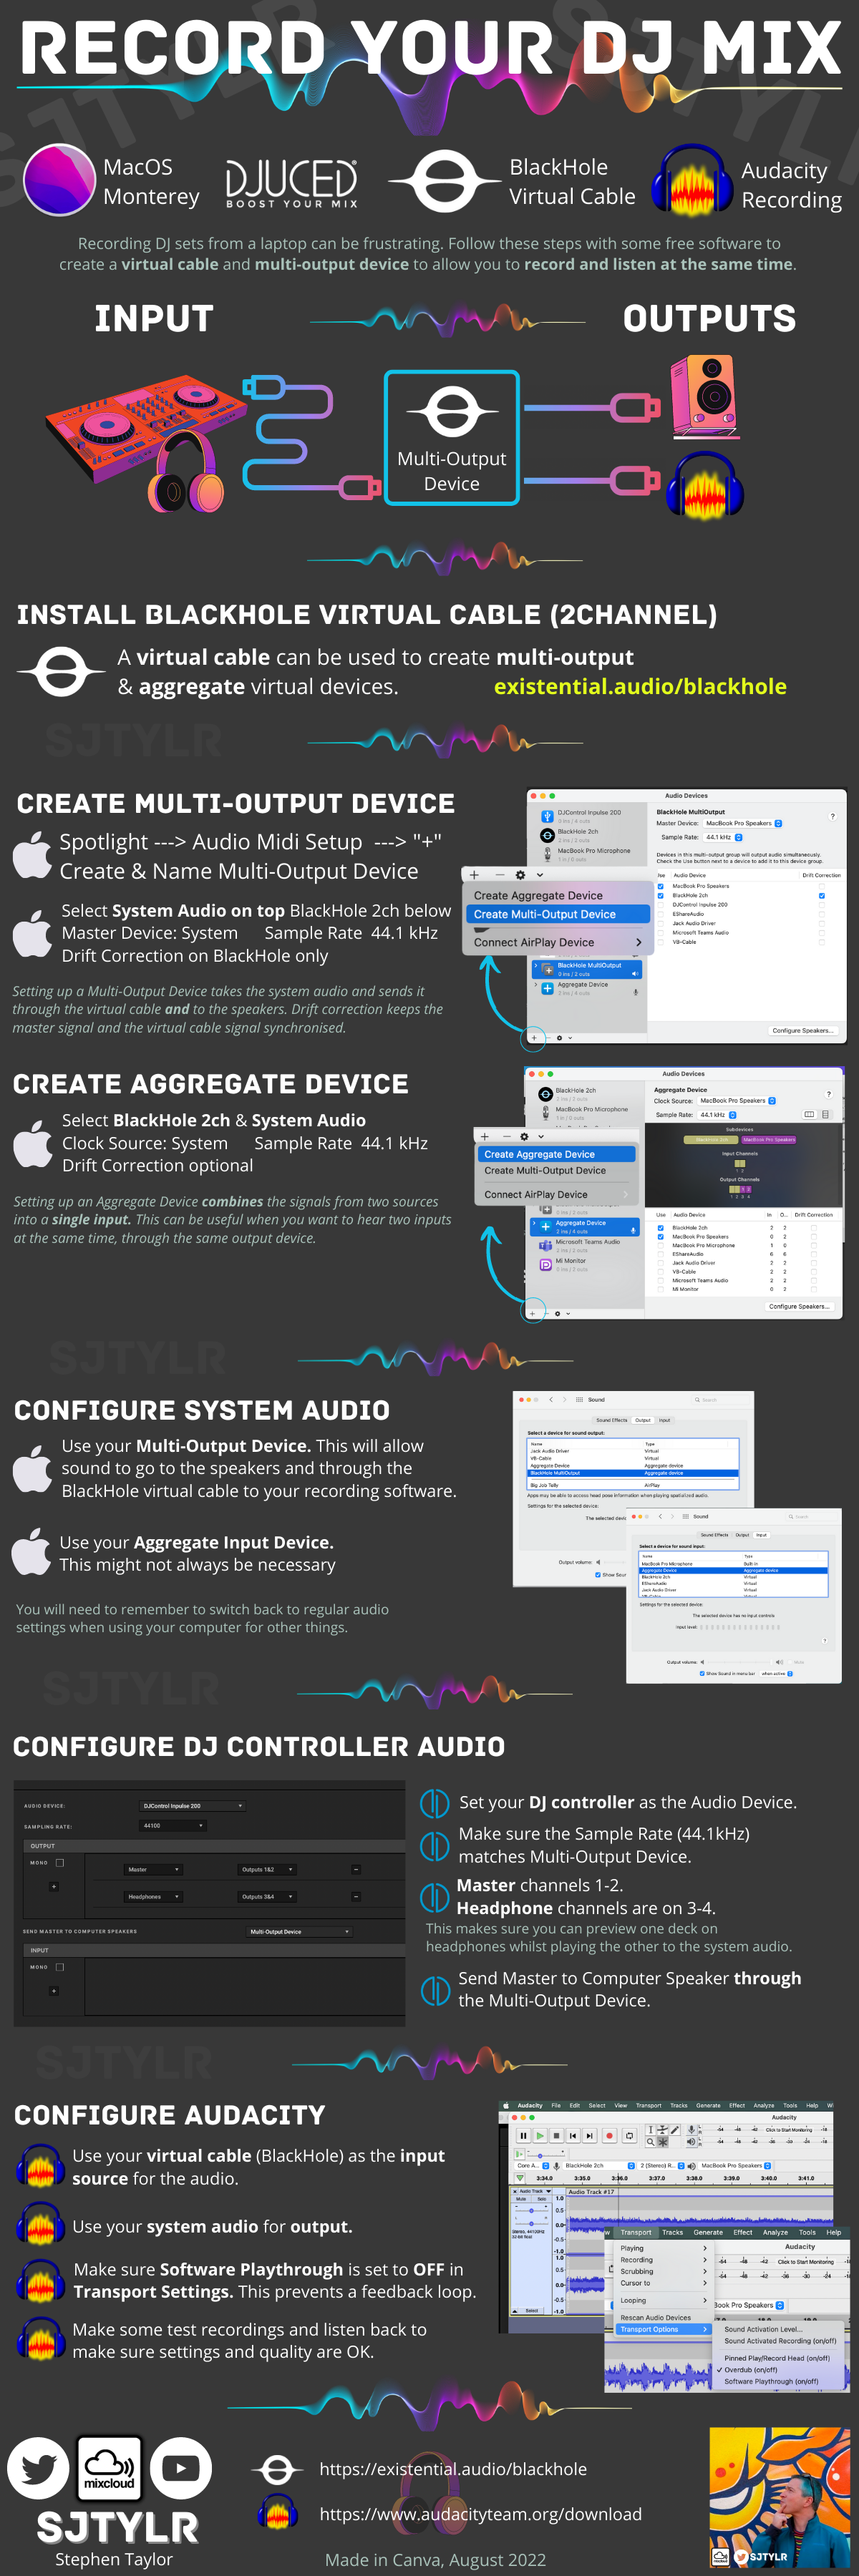
What’s A Virtual Cable?
Recording a mix normally uses extra cables and equipment. With a virtual cable and the Midi settings on Mac, you can create a Multi-Output Device to send the sound signal to the speakers and the recording software. Easy(ish) when you know how. A pain when you forget how.
I tried a couple of virtual cable setups, but the one that worked best for me on Monterey was BlackHole, a free download from Existential Audio.
How To Set It Up
Here is an infographic with the steps I used to make it work. You can get the pdf here. The trick is to go step-by-step and keep track of your settings. Click to make it bigger and zoom in.
So Does It Work?
Yes. Eventually.
Show Us Your Mixes Then?
I have a MixCloud account here.
MixCloud accepts DJ mixes and you can create a time-stamped tracklist, so MixCloud makes sure the artists are compensated if you use their tracks.
The MixCloud mobile app is great for following other DJ’s for inspiration and learning.
So there you go. I hope it helps. You can use a similar setup for things like recording voice-overs on gaming and commentary on videos.

Thank-you for your comments.